IoT with MQTT, Raspberry Pi and a cheap Remote Control
This tutorial will give you some inspiration and ideas on how to switch lights or other devices using a Raspberry Pi and a cheap remote control switch from the hardware store. Of course you can modify the code so that it suits your needs. The components used here cost around 100$ only.
1. Architecture
As a basic connectivity we use the MQTT protocol, that is quite famous in IoT for its low footprint. If you don’t know MQTT or want to get more information, check these links:
MQTT, Das M2M und IoT Protokoll
(in German)
MQTT 101 – How to Get Started with the lightweight IoT Protocol
(in English)
As you can see from the figure below, the Raspberry Pi microcontroller hosts two components — a broker and a client. The broker will receive an MQTT message with a topic prefixed by /lights/ from a client, e.g. a mobile app. The sender.py script will communicate with a sender hardware attached to the Raspberry Pi to send the signals to the switches.
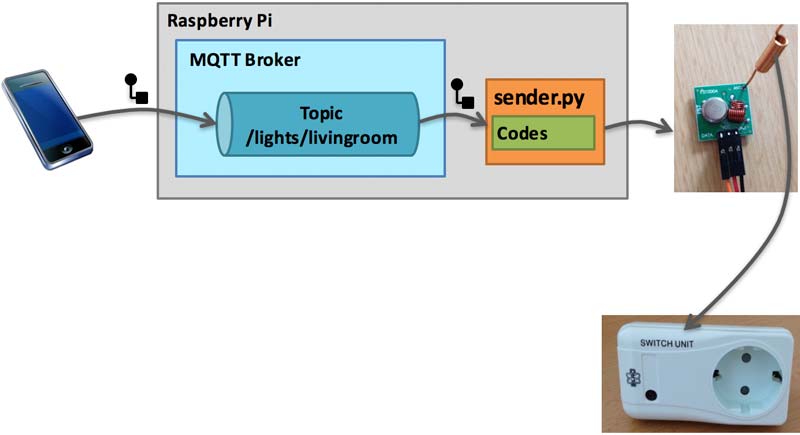
Figure 1:
2. Hardware Components
2.1. Remote Controls
We used cheap radio remote control switches by ELRO. The AB440S/3C series come with one sender and three receivers. You can buy this set for 56.72$ on Amazon or for 51.04$ on eBay. The author bought a kit for 10€ only (about 12$) in a hardware store.
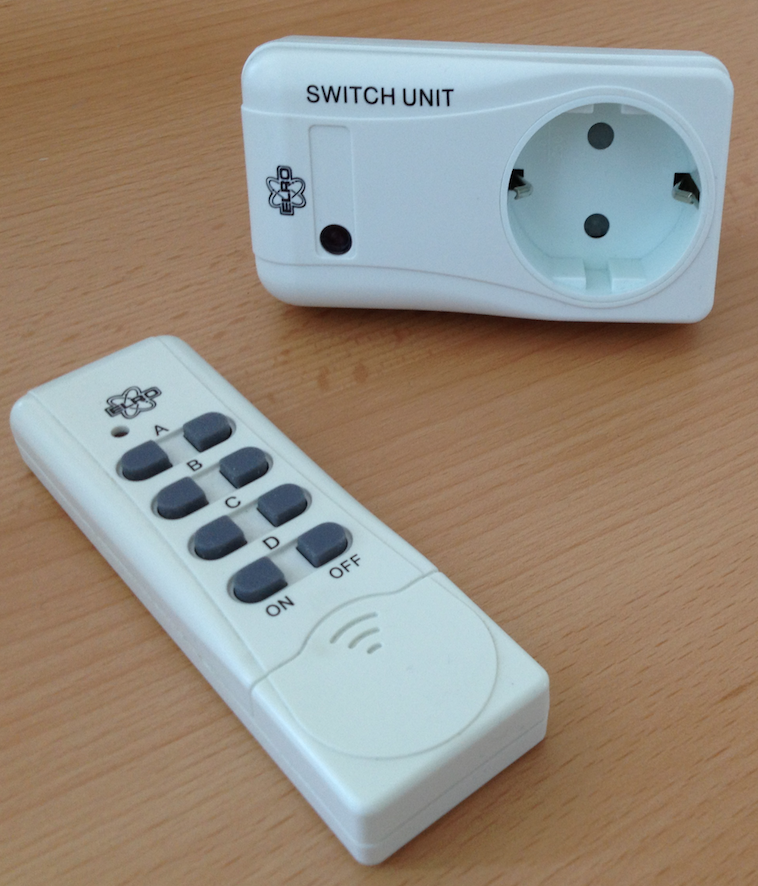
Figure 2:
To use other controls, modifications to the solution presented here might be needed. If you have used other models successfully, please let us know.
We used the receivers to connect to the lights. The sender of the kit is not used for the final setup. Only if the signal codes provided are not working for your remotes then you need the sender to figure out the codes.
2.2. Microcontroller (e.g. Raspberry Pi)
We used a 3rd generation Raspberry Pi as a controller. You can check its hardware characteristics on RaspberryPi.org.
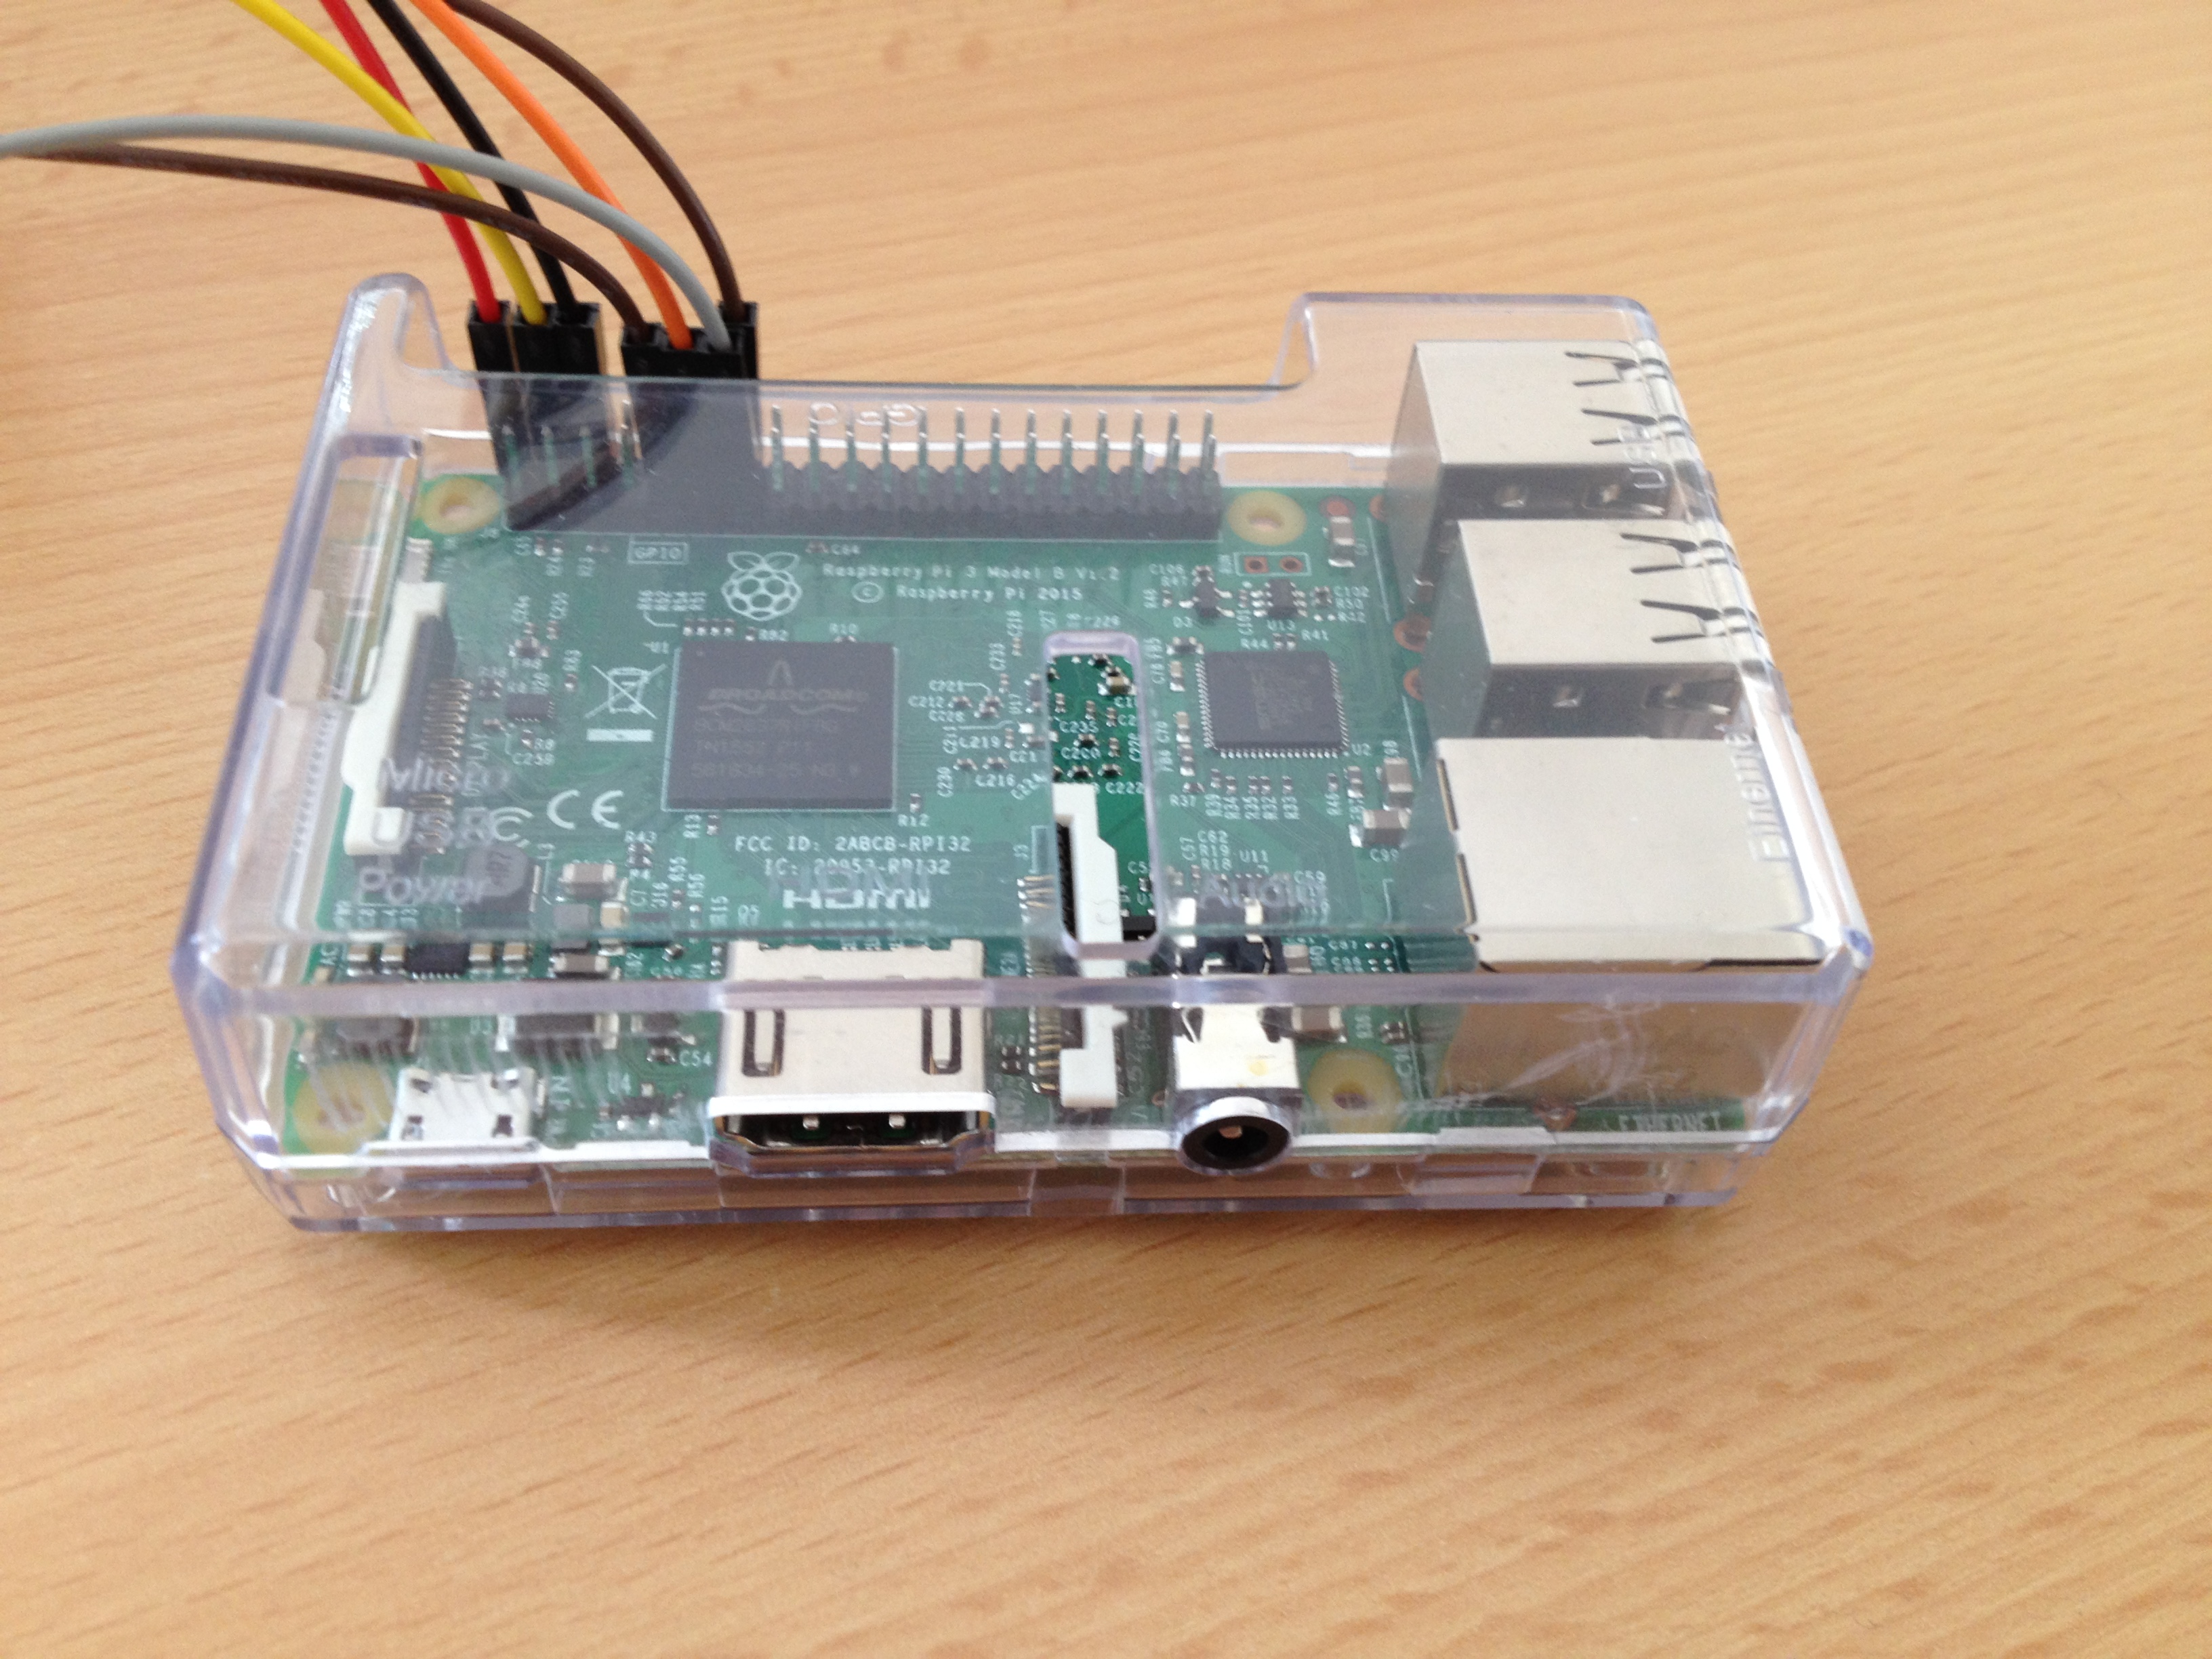
Figure 3:
A Raspberry Pi costs now from 39.20$ on Amazon. In addition to a microcontroller you might also need to have a power adaptor (10.99$, Amazon price) and a protective case (6.95$, Amazon price).
Other microcontroller alternatives such as Arduino, Banana Pi, Odroid-Platine, etc. should also suit.
2.3. Sender and Receiver
We need a sender in the 433 MHz band for the microcontroller to communicate with the receiver of the remote control switch set. We will use this sender instead of the default sender of the remote control switch set. Once you have figured out the signal codes, you only need the sender for the final solution. In order to connect sender and receiver units to the microcontroller, please check these links:
Raspberry Pi – Pilight mit 433MHz Modulen zur Hausautomatisierung
(in German)
Super simple Raspberry Pi 433MHz home automation
(in English)
The components are:
-
Transmitter and receiver kit (from 2.36$ on
Amazon)
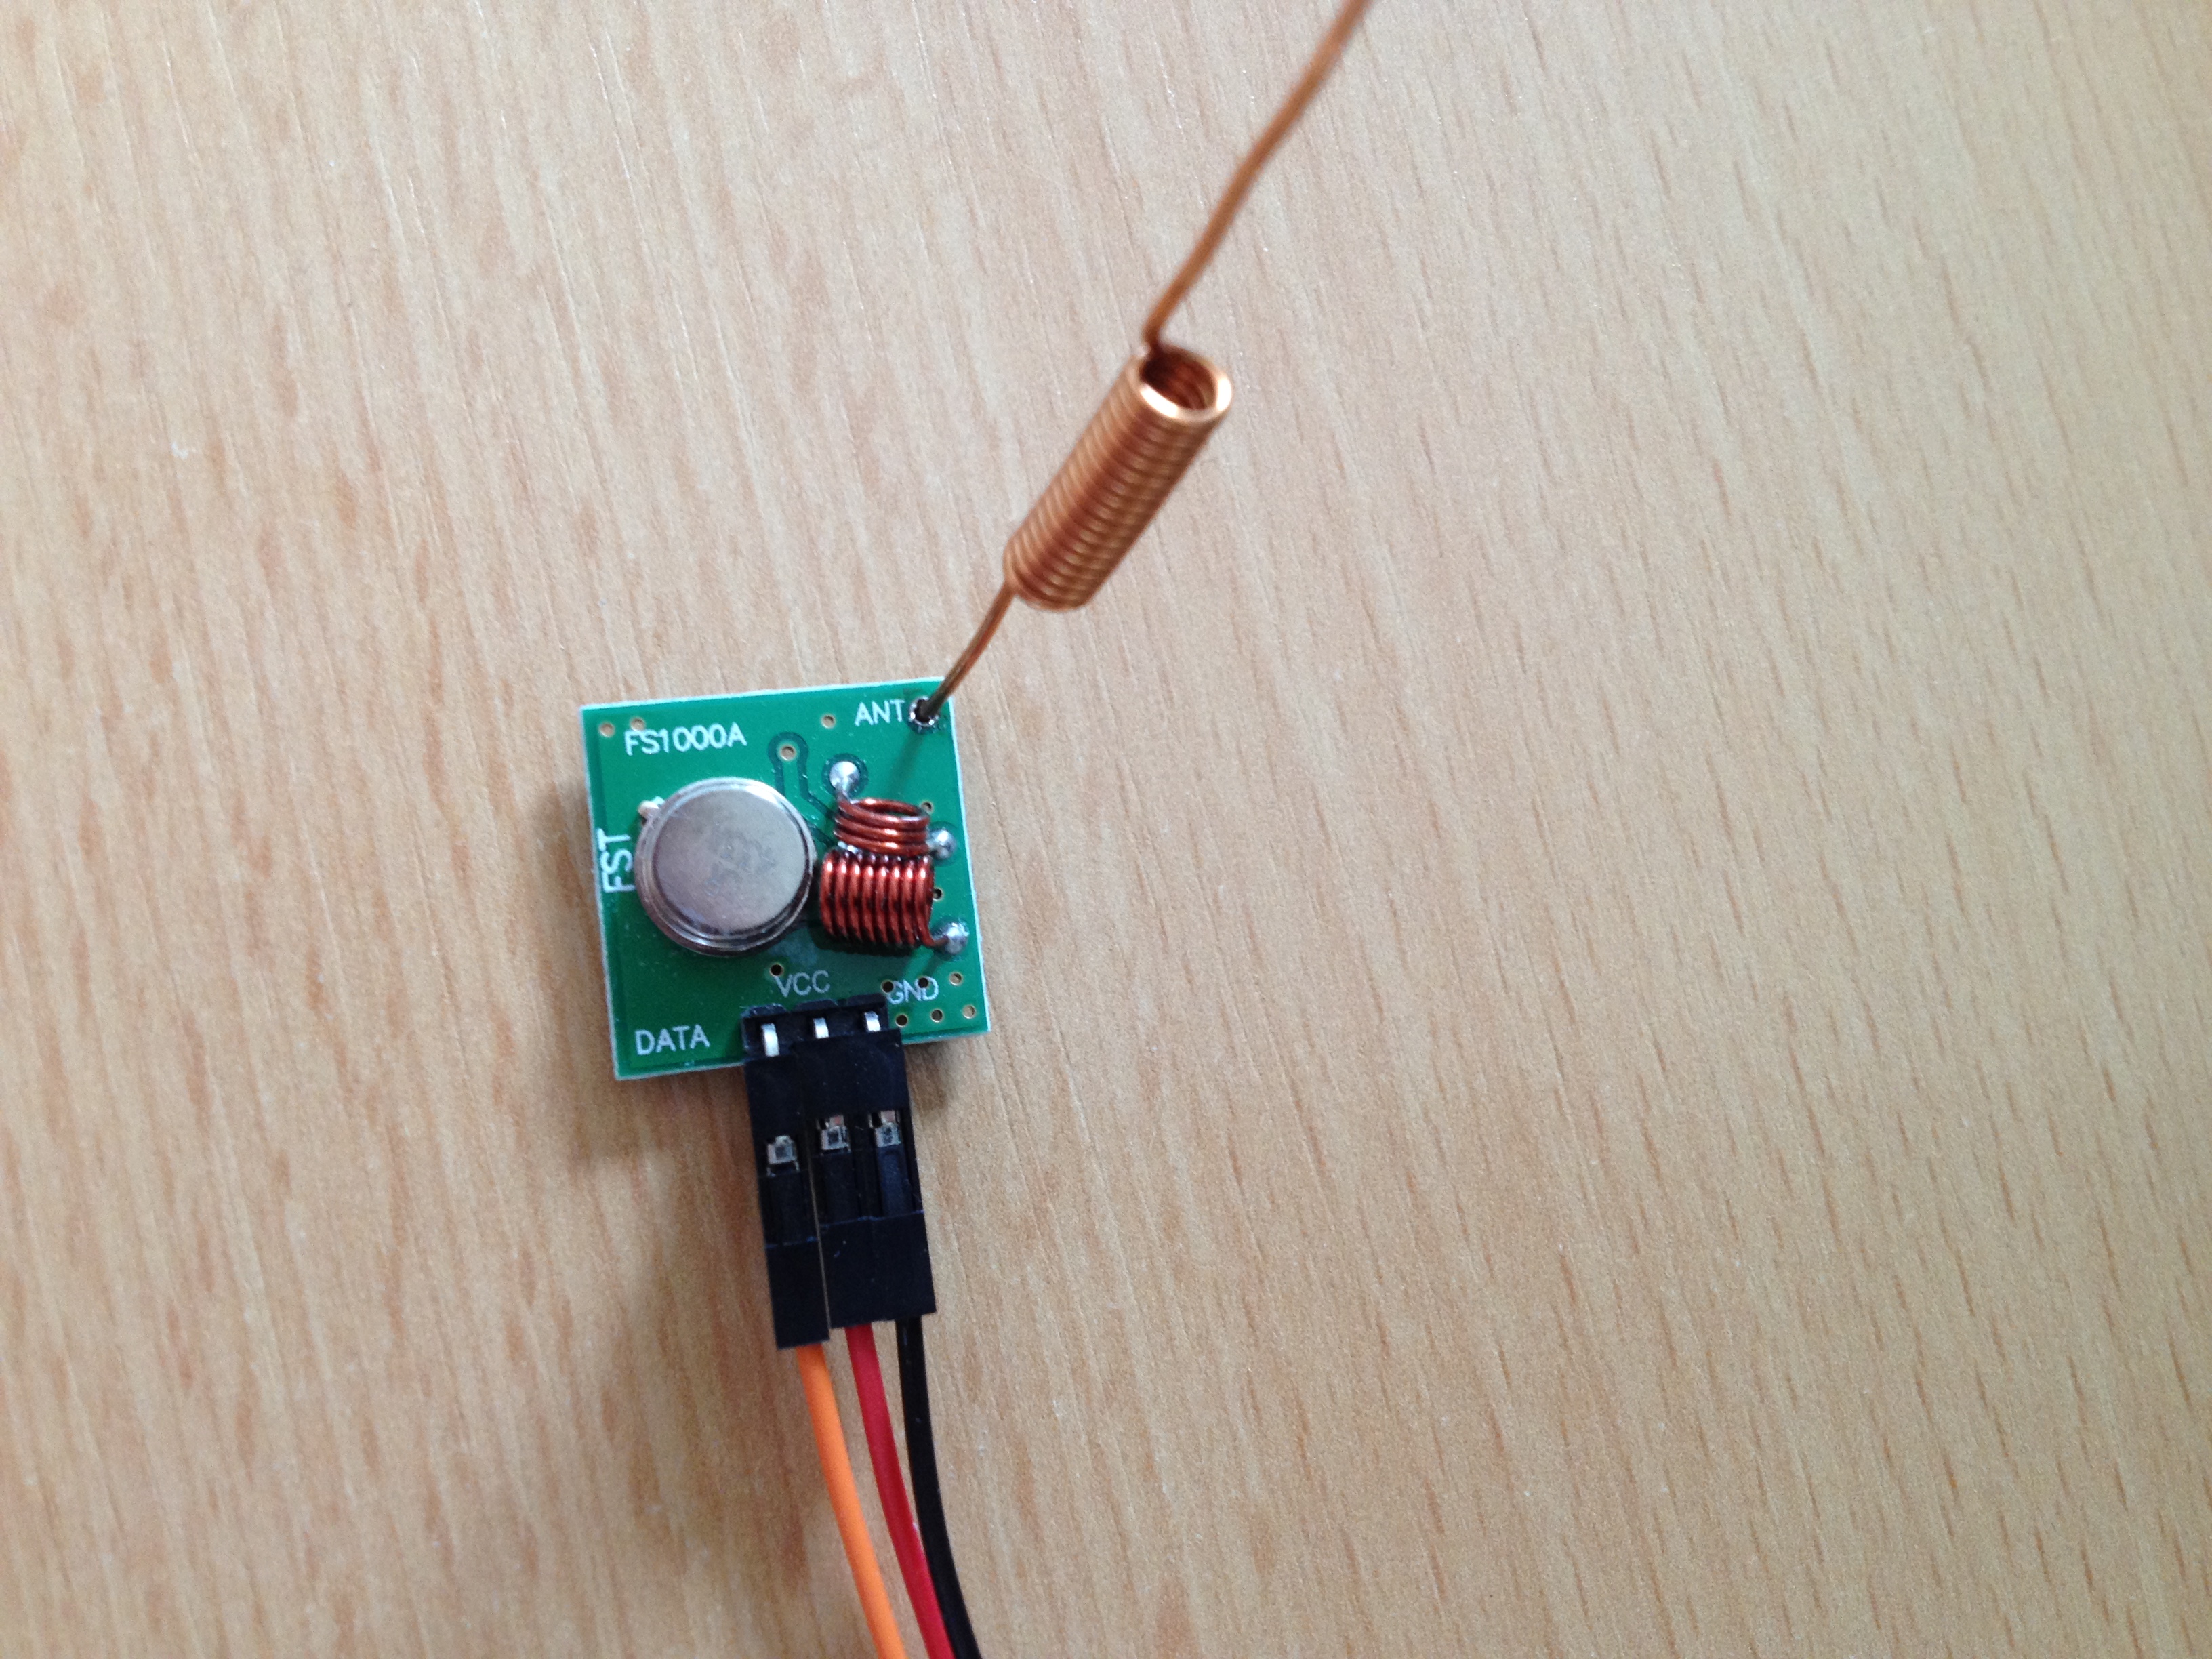
Figure 4:Transmitter module
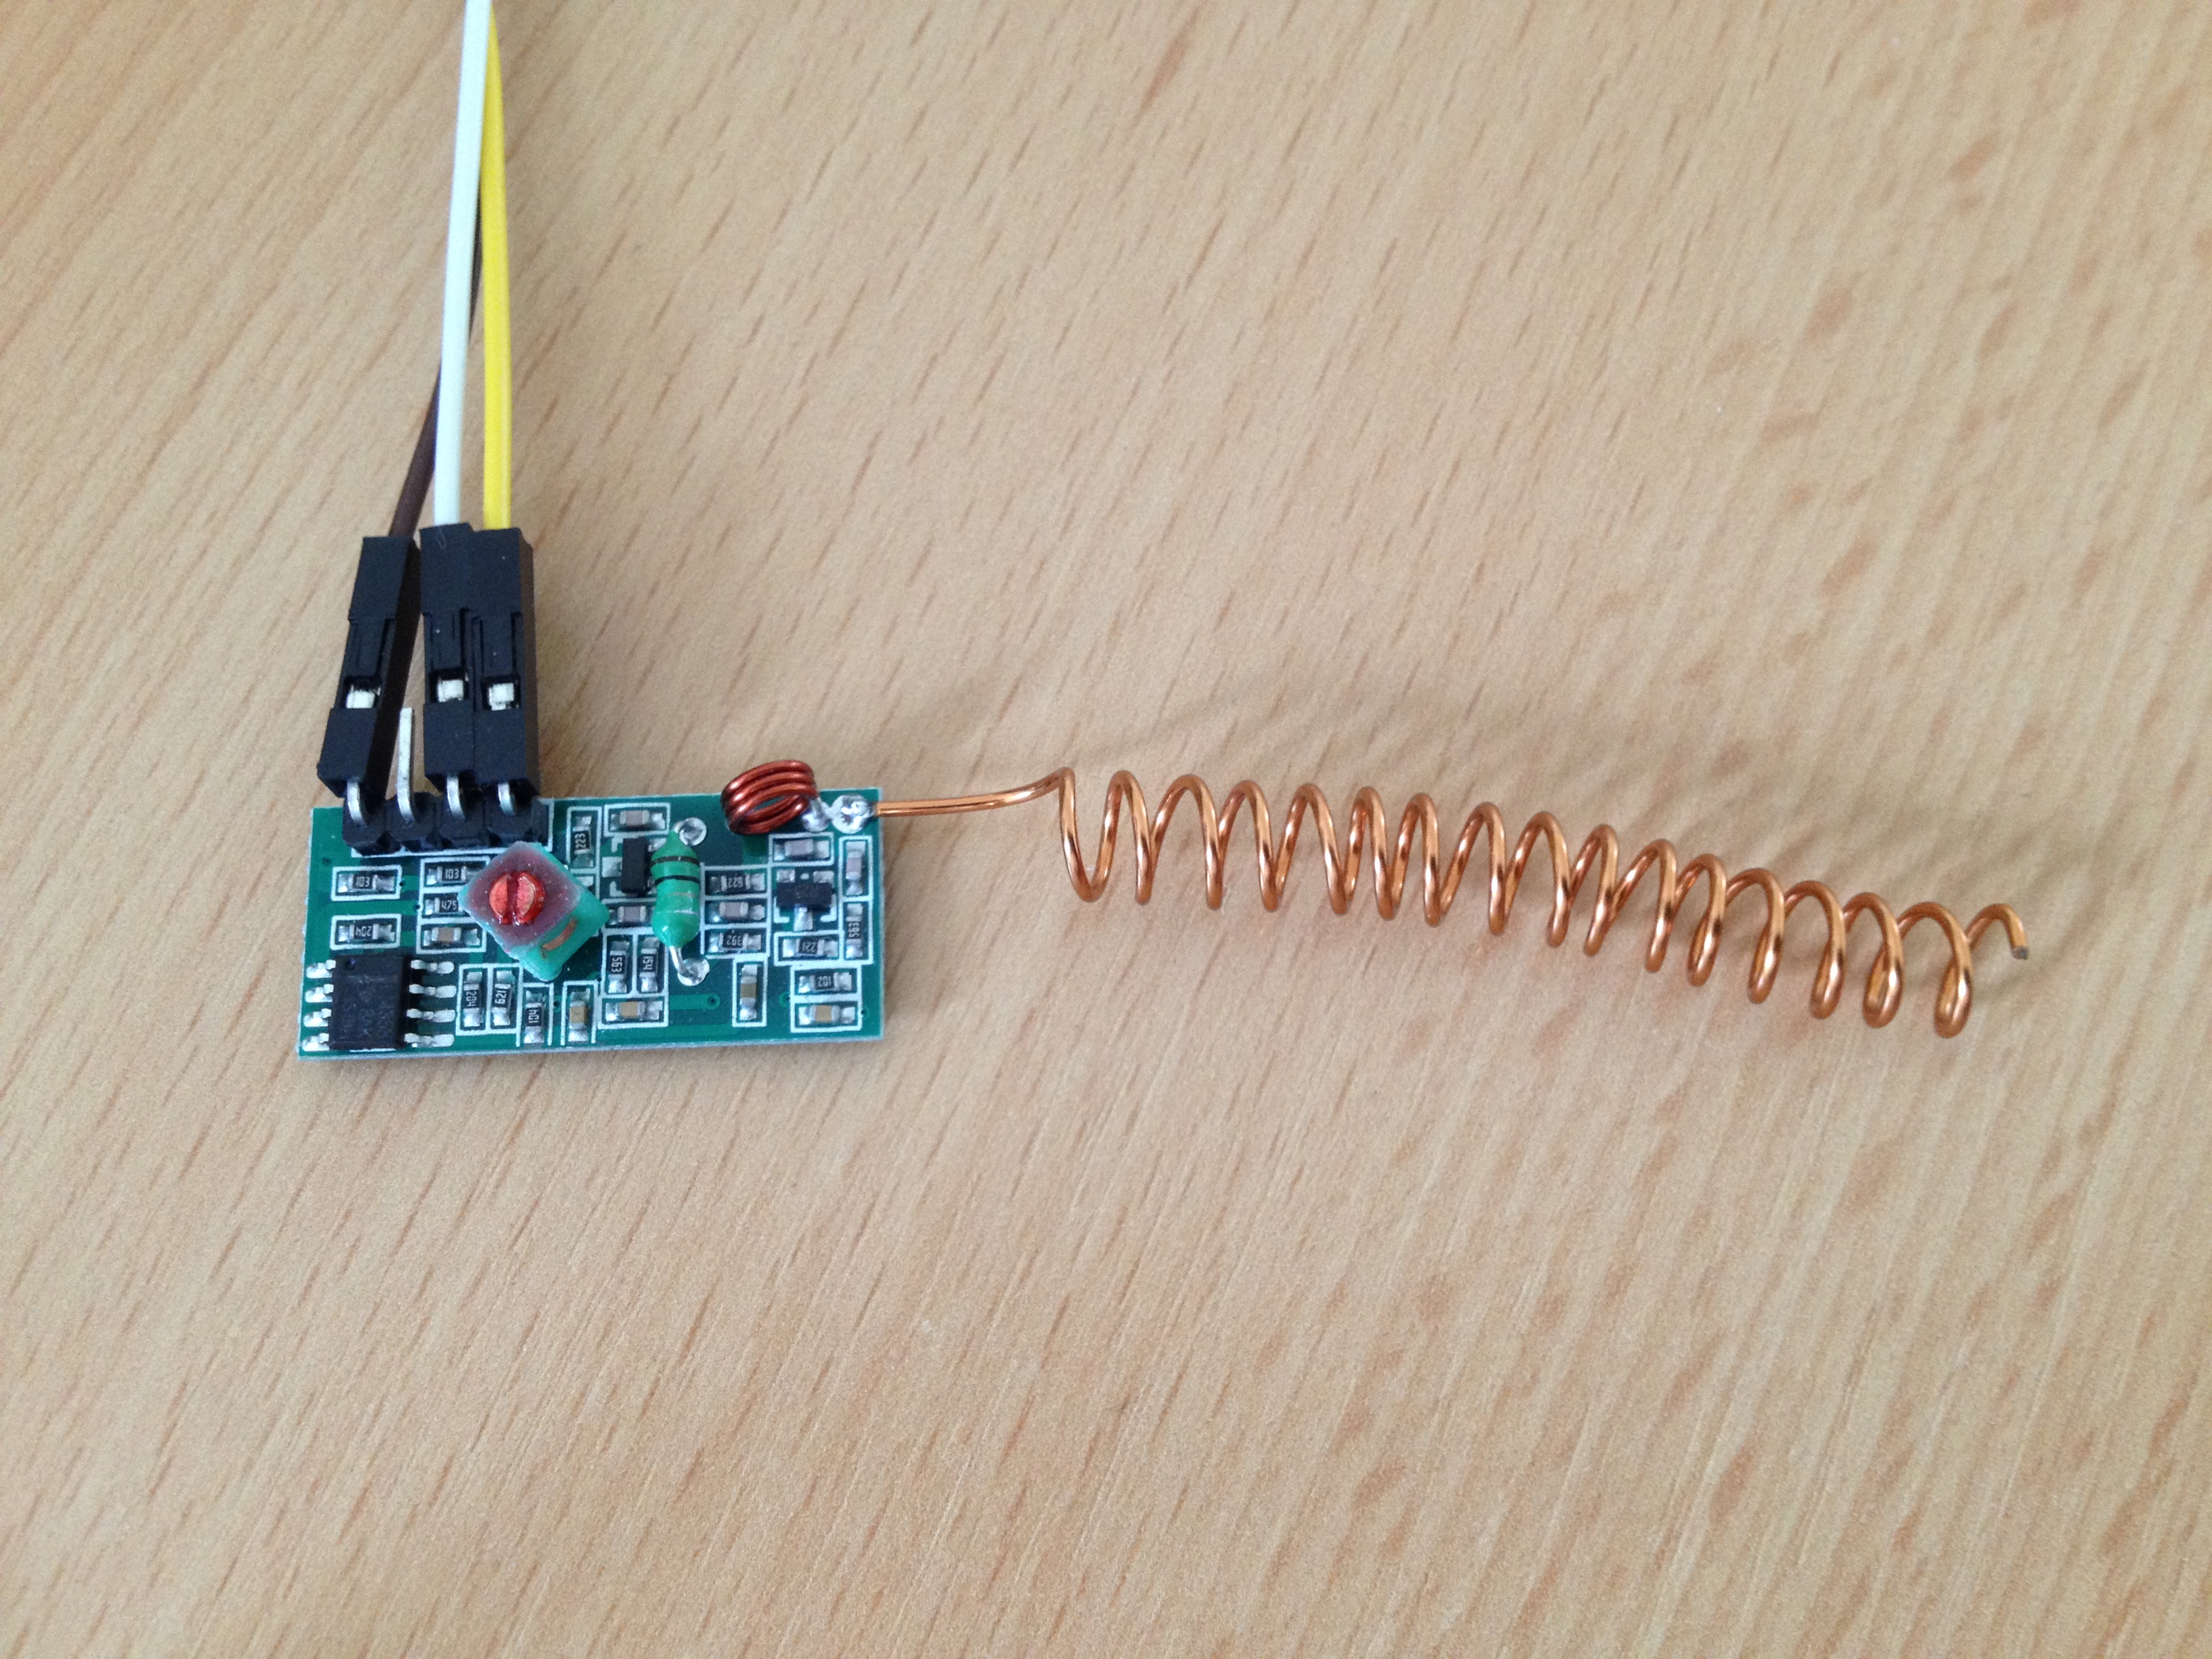
Figure 5:Receiver module
- Jumper wires / cable female to female (4.58$ on Amazon)
- Helical antenna remote control (4.99$ on Amazon)
- Enamelled copper wire for receiver module (2.03$ on Amazon)
-
Carbon film resistors 8.2 kOhm and 12 kOhm for a couple of cents
(Amazon for 8.2kOhm,
Amazon for 12kOhm)
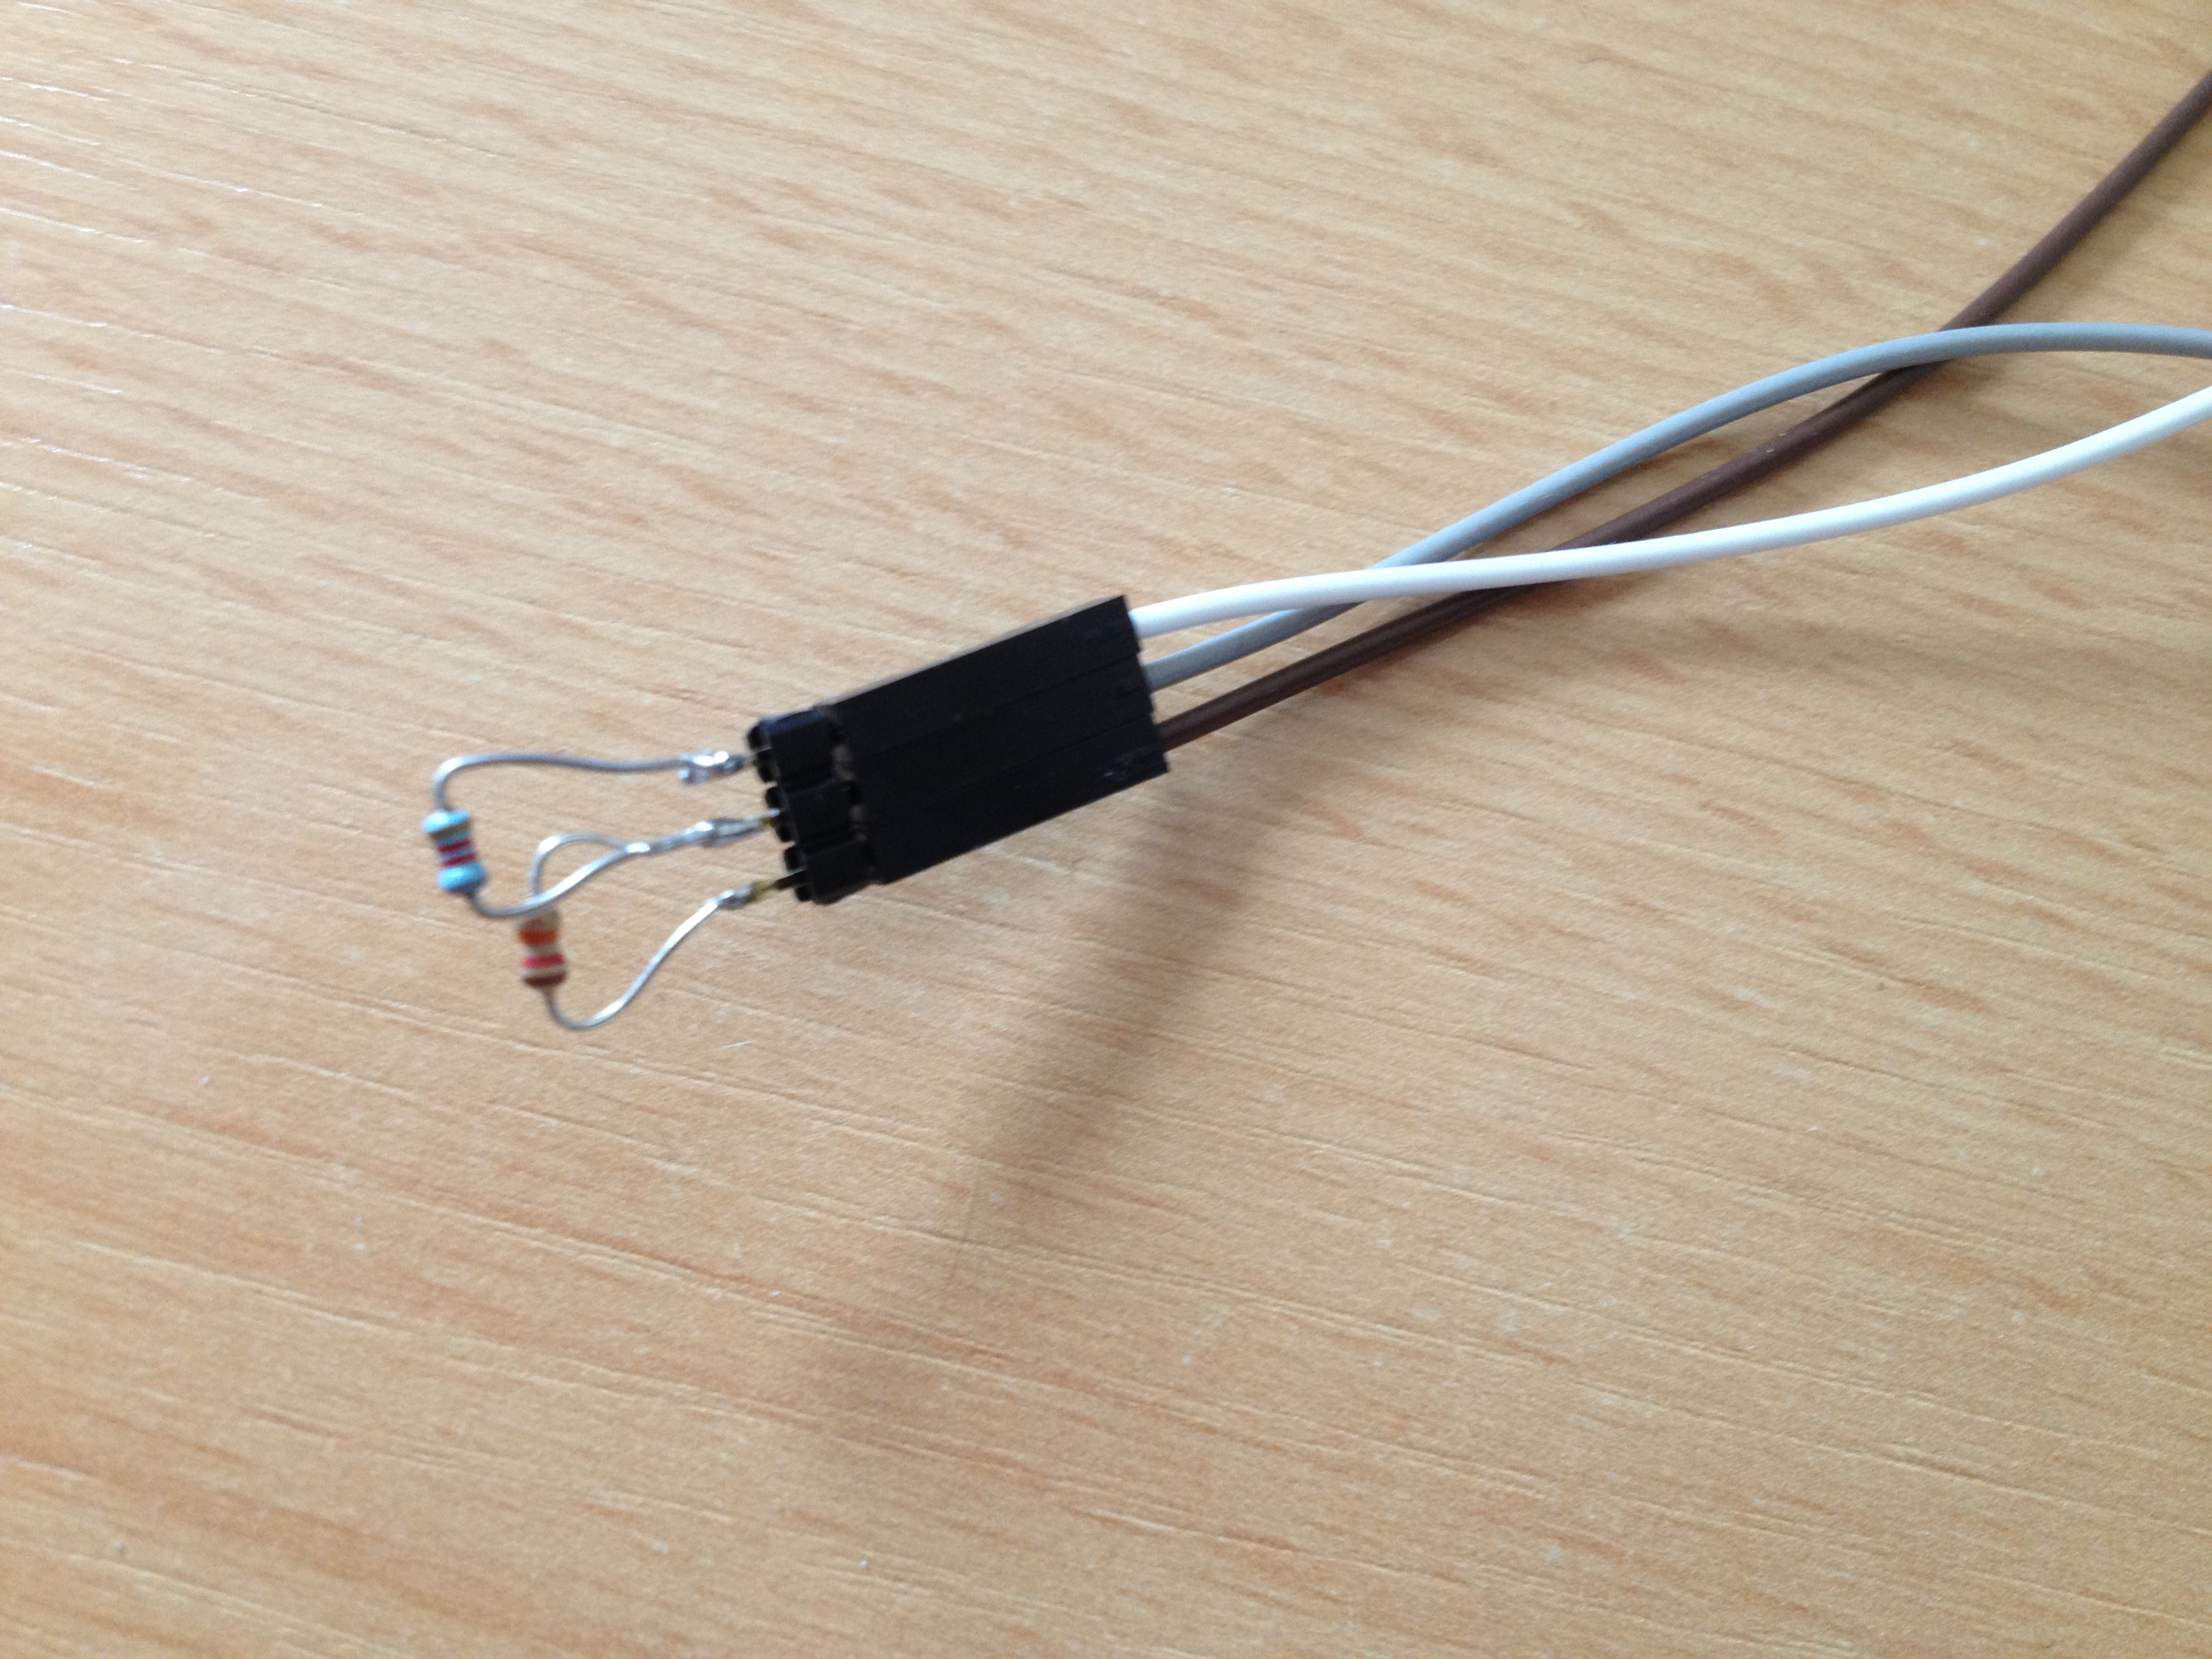
Figure 6:Carbon Film Resistors
3. Software Components
3.1. MQTT Broker
To get messages from the client to the Python script that triggers the sender component we use an MQTT broker in-between. The MQTT protocol was developed for telecommunications and is now pretty popular for IoT due to its low footprint.
In our solution we use an open-source Mosquitto v.3.1 message broker.
3.2. MQTT Clients
We have three types of clients with different libraries installed.
Raspberry Pi which runs both broker and client in one place uses Paho MQTT Python which is a new version of a previous Mosquitto Python module.
PC runs an MQTT client tool called MQTT.fx for debugging. This tool is helpful when we want to watch the messages and their topics that are published to the Raspberry Pi broker.
Moscapsule framework is installed in the iOS app and represents a Mosquitto library wrapper with most of its functions.
Feel free to use libraries for other platforms as well.
3.3. Python Scripts
You can find all Python scripts on GitHub.
3.3.1. Sender Script
Script sender.py is triggered from the Raspberry Pi client script at the time it receives a message from the Raspberry Pi broker.
3.3.2. Receiver Script for getting the Signal Codes
We have written a receiver.py script to determine the look of the signal that the receiver unit gets from the remote control. Once all signals are known, we can use a sender script.
4. How to set it all up
4.1. Remote Control
Configure your remote so that the lights react to all buttons of the remote control.
We used the channel code you can see on picture below. For that you need to set one or more dipswitches 1 till 5 under the cover. In the instruction manual of the controls you will find more information on how to set the code. If you use the same channel code, this solution here might work out of the box.
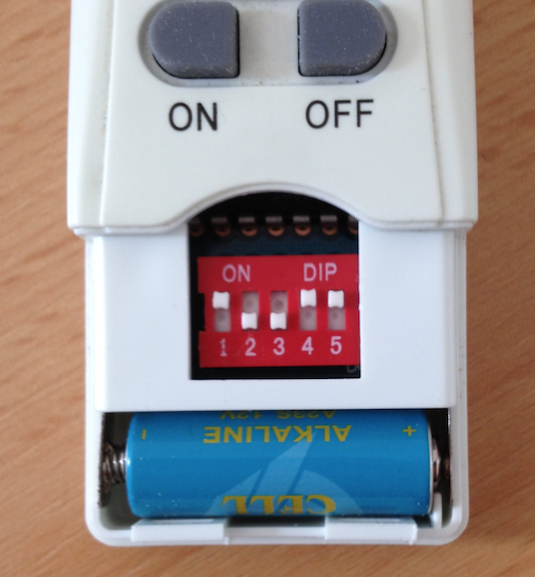
Figure 7:
4.2. Broker
Install Mosquitto broker on your Raspberry Pi. Installation instructions can be found here:
MQTT: Broker Mosquitto installieren
(in German)
Installing Mosquitto on a Raspberry Pi
(in English)
4.3. MQTT Client libraries
For each of the clients in section "Software Components. MQTT Clients" refer to the corresponding source links of their libraries:
4.4. Raspberry Pi Client Configuration
All scripts mentioned in section "Software Components. Python Scripts" are available on GitHub.
4.5. Signal Determination
The receivers can only be triggered by the right binary signal. For the ELRO remotes, the right signal configuration is already hardcoded into the Python scripts. If you are using some other brand please continue with the following paragraph. Otherwise skip to the next section.
4.5.1. How to reverse engineer the Signal for the Remotes?
The most challenging yet interesting part is signal determination. We did it in two steps. First, we wrote a script for receiver (Raspberry Pi microcontroller) that gets signal codes from the radio remotes when some button is pressed. After getting the feel about how much time the code delivery took and how many iterations did the signal perform, we wrote a sender program. The sender script is launched in final solution from the lights script which configures the client. Commented source code for all three scripts you will find on GitHub.
4.6. PC Tool and App as Remote Control
You can use anything that can send MQTT message with a specific topic as a remote control, e.g. apps, PC tools and scripts. The most straightforward approach is to use a simple MQTT client tool on PC called MQTT.fx (download link). There are other alternatives available, which are listed in this article by HiveMQ team.
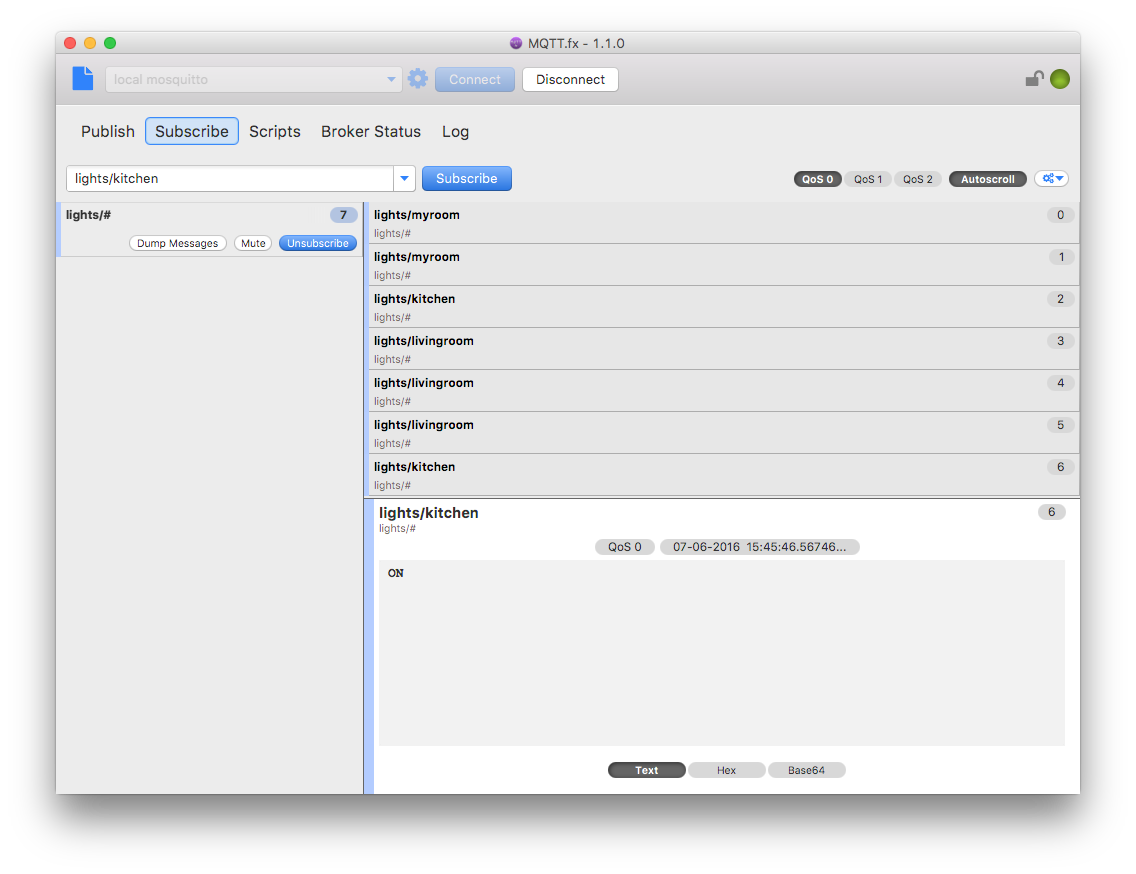
Figure 8:
We have also written an iOS app as shown below and used it as a remote control. Please find the source code on GitHub.
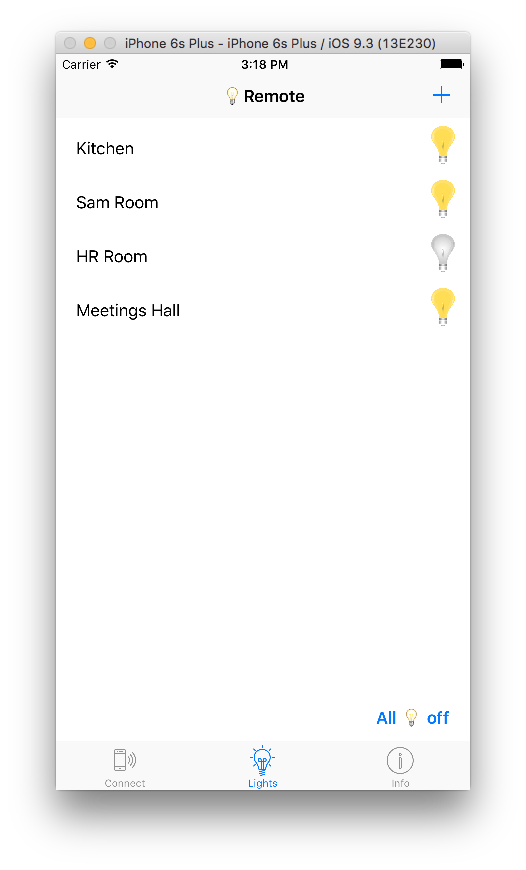
Figure 9:
4.7. Test your implementation
Make lights.py Python script run on start up on your Raspberry Pi. Use your preferred remote control to manipulate the lights. We hope you will enjoy!